Kitchen interior design illustration: drawing in 5 steps
The design project of any environment, besides the technical drawings finalized to the understanding and construction of the work, needs to be complemented by three-dimensional images (usually called renders), to show the real result of the space once the project is installed. These perspective images can be made with freehand drawing techniques (as in the case of this illustration) or with computer software that generate realistic renderings.
Step 1
First, you can make the perspective sketch with graphite pencil, without taking care of the details of each element, but only identifying the major forms of the composition (figure 1). You can do the drawing freehand without a ruler. In this first phase you should not press the pencil on the paper, as these are provisional lines that can be changed later.

Step 2 of interior design illustration
Next, the drawing must be reviewed, still with pencil or graphite pencil, with more precise and straighter lines (figure 2). You can use the ruler or set square, if necessary. At this step it is important to observe the details of the furniture and pay attention to the conic perspective.

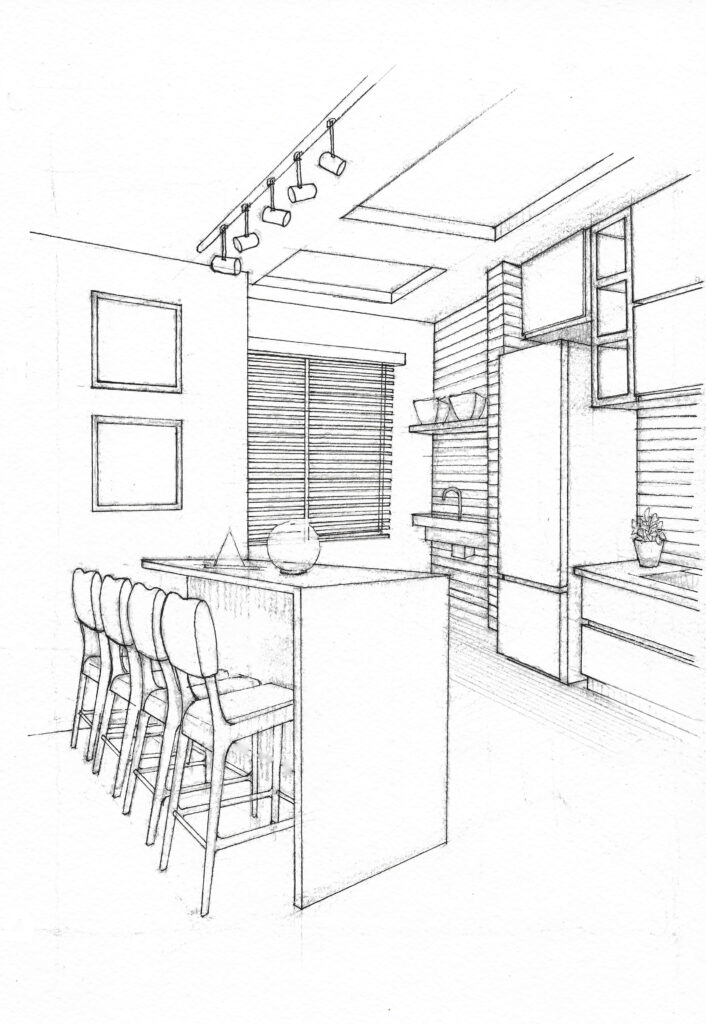
Step 3 of interior design illustration
After defining the drawing, it is recommended to draw all lines with the 0.1 ink pen, using a ruler or set square to draw straight lines (figure 3). This makes the interior design illustration clearer to visualize. After the black ink, you can use an eraser to clean the excess graphite that was left under the black ink. In this operation the construction lines of the drawing will disappear to leave only the definitive lines of the illustration. Where you find that the graphite lines are adding more value to the drawing thanks to the greater thickness in the shaded points, they can be left on with the black ink.
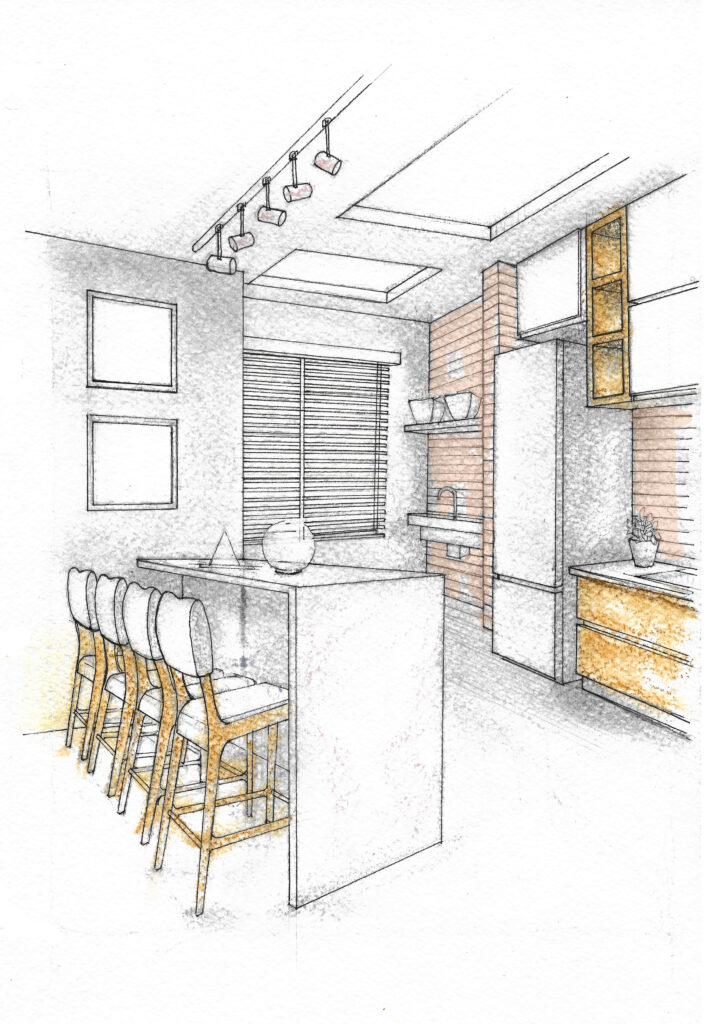
Step 4 of interior design illustration
Next we can start by adding some colors with the soft dry pastels (picture 4). In this case the colors gray, pink and light brown were used. The shaded parts of the white elements can be painted with a softer graphite (it can be varied from 2B to 8B). To distribute the dry pastel pigment better, you can use a brush or a piece of soft paper (ex. toilet paper).
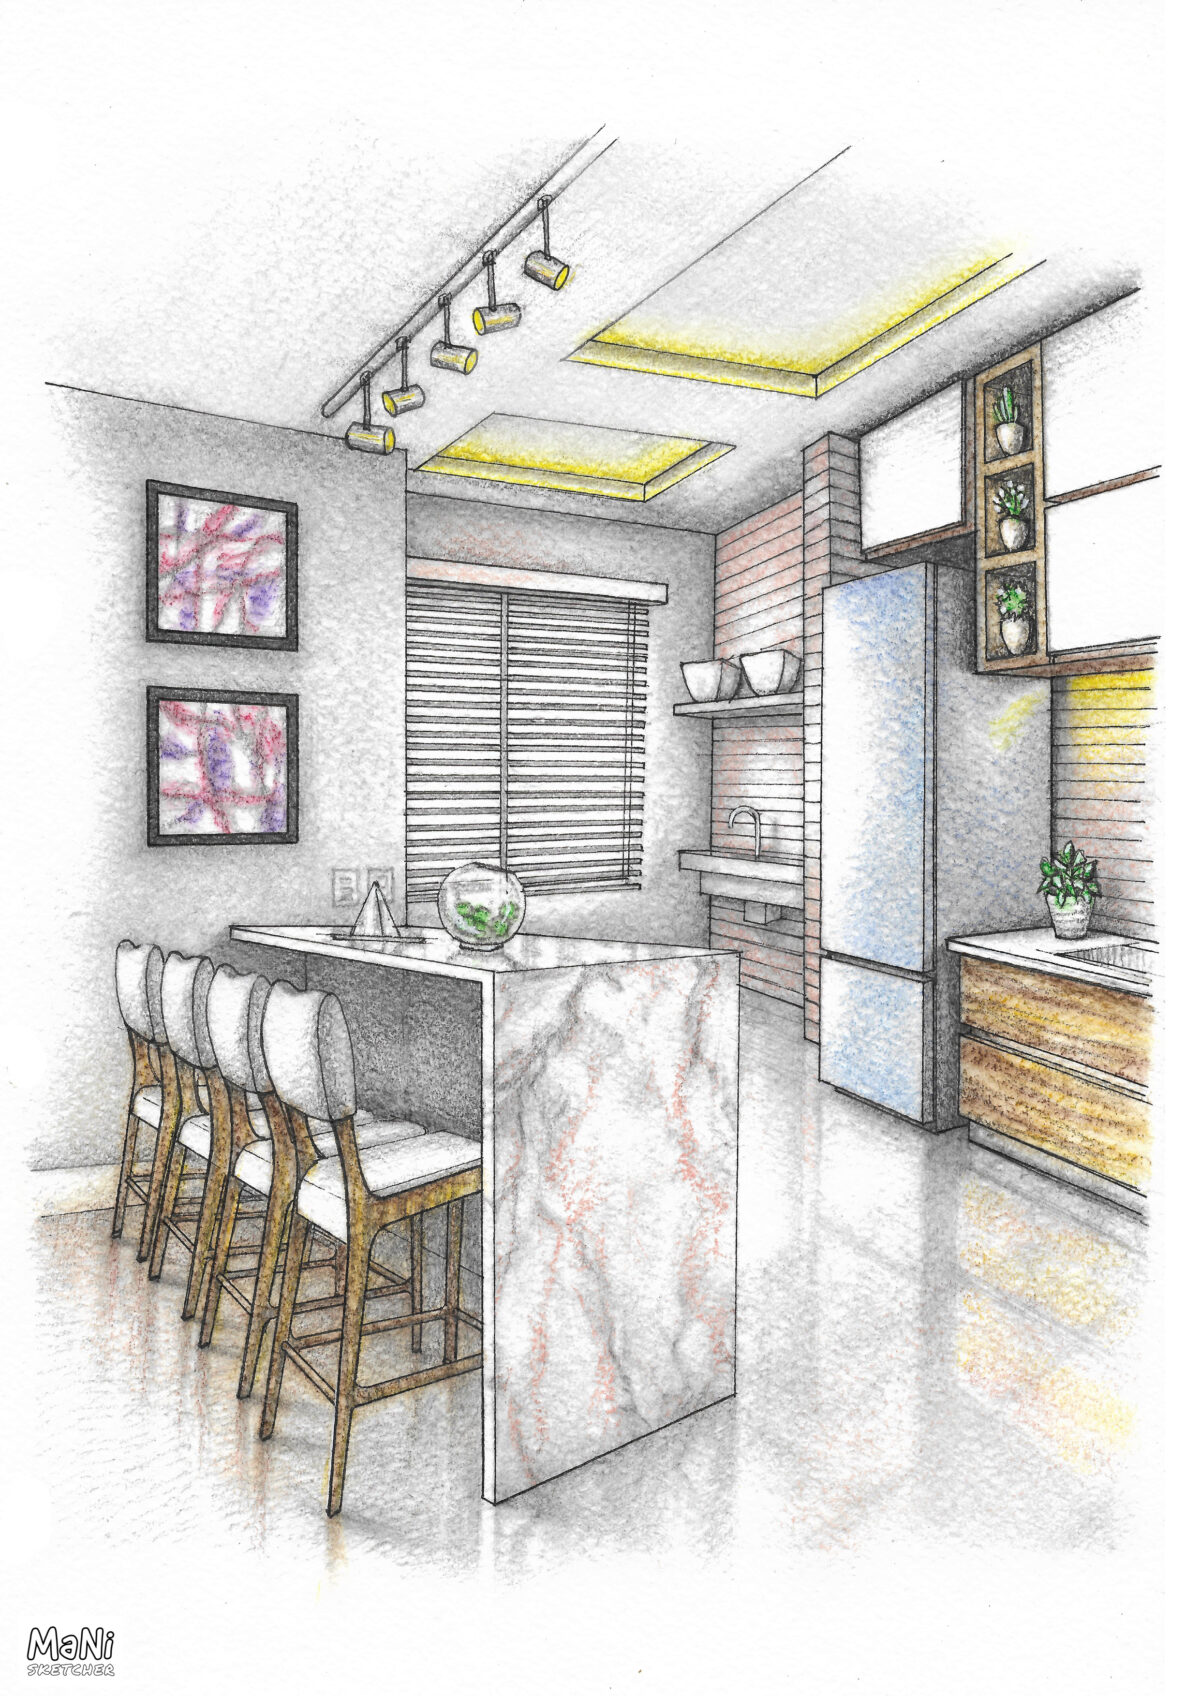
Step 5 of interior design illustration
The last step of this interior design illustration demands more time and dedication, as it needs attention to all the details of the elements in the composition (figure 5). It is recommended to start filling in the areas of uniform color with graphite, such as the frames of the paintings. Next, with enough patience, you need to fill the shaded areas with a darker shade. Then add the textures and colors, emphasizing the points of light and reflections. The technique used is a mixture of dry pastel and graphite, overlapping the graphite with the colors. At the end you can go over some lines with ink pen, to define more clearly some objects, such as the decorative plants.

If you want to try the soft dry pastels, I recommend this set of 24 colors with a square profile
See here the drawing process of this illustration in a video.
If you’re interested, by clicking on the button below you can take a look at my interior design illustration service for customized projects.