In this post I show you the interior design illustration process, done by hand using traditional techniques, for a residential loft.
Here we describe the stages of drawing, with the intention of inspiring architecture and interior design professionals to work with traditional illustration in their projects.
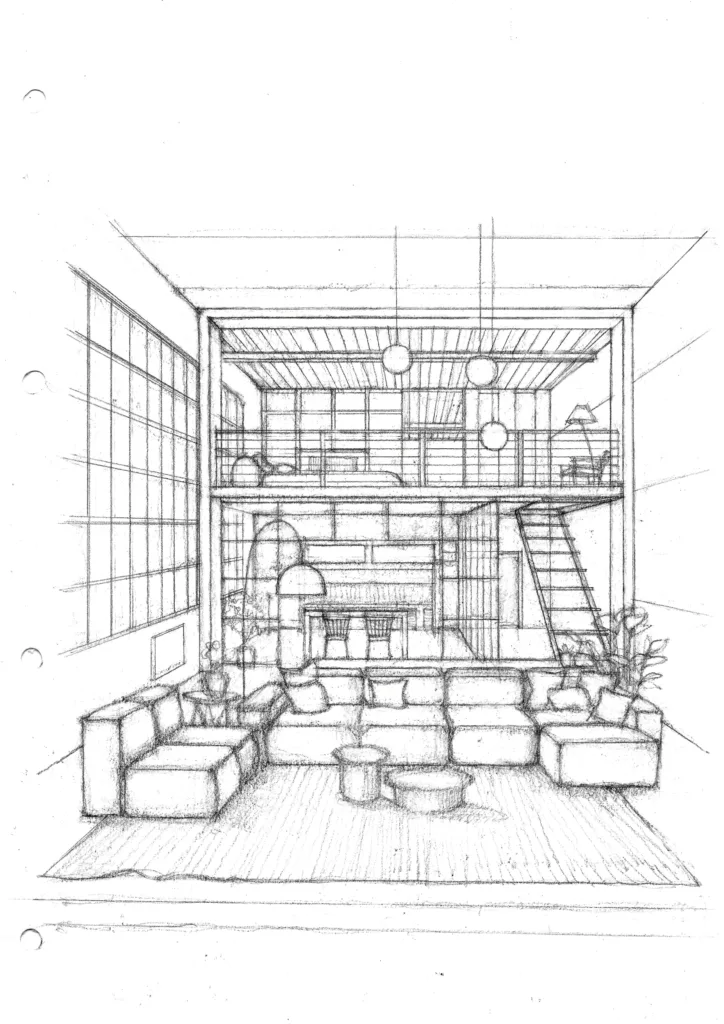
Stage 1
The first step is to draw the outlines of the shapes and volumes that make up the composition, using a soft graphite pencil such as a 2B or 4B.

Stage 2
Next, the second step is to start detailing the elements in order to improve the visual reading of the drawing, still drawing freehand. To do this, it is advisable to pay attention to the lines that make up the central perspective.

Stage 3
On this base, you can now use a ruler or square to draw the straight lines, increasing the level of definition of the pencil drawing.
I do well with these soft graphite pencils.
Stage 4
Once the drawing is ready, it’s a good idea to trace the lines with ink pen 0.1 and then erase the excess graphite that remains underneath, leaving the drawing cleaner.

I like to use these kinds of Ink pens.
Stage 5
At this point, start filling in the darker surfaces with a soft graphite tip, for example 2B or 4B. On some objects you need to start applying the effect of light and shadows.


Stage 6
In this step, use soft dry pastels to leave the color on the paper. You can then spread the colored pigment using a brush or a piece of toilet paper, pressing the color so that it adheres to the paper.

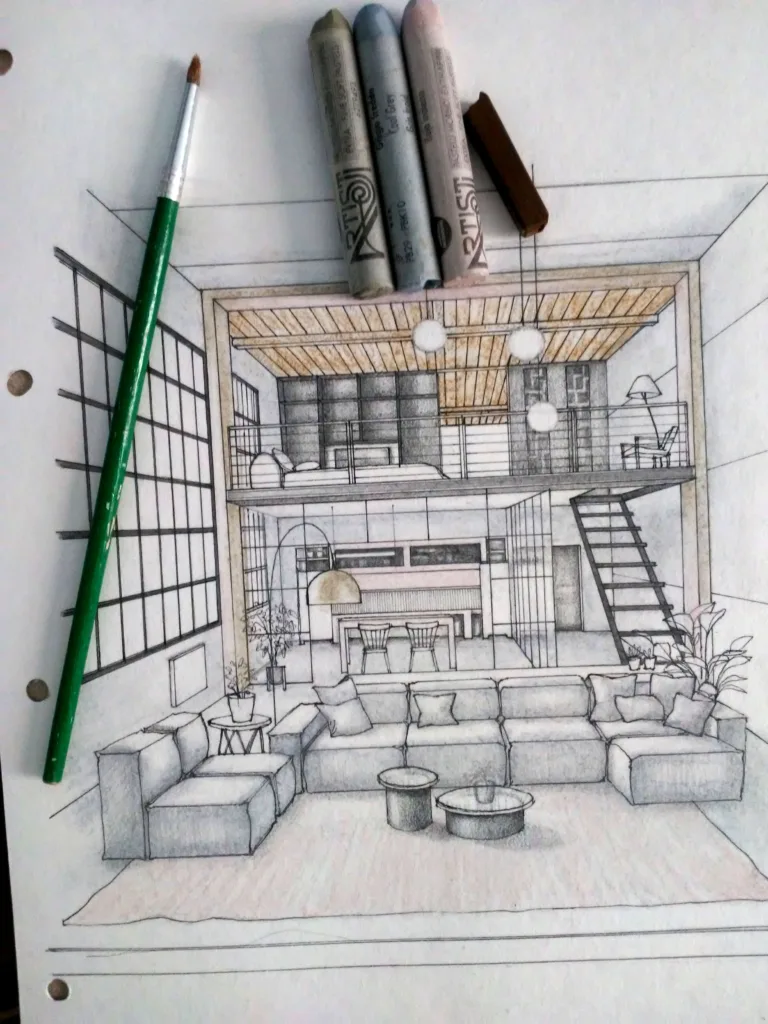
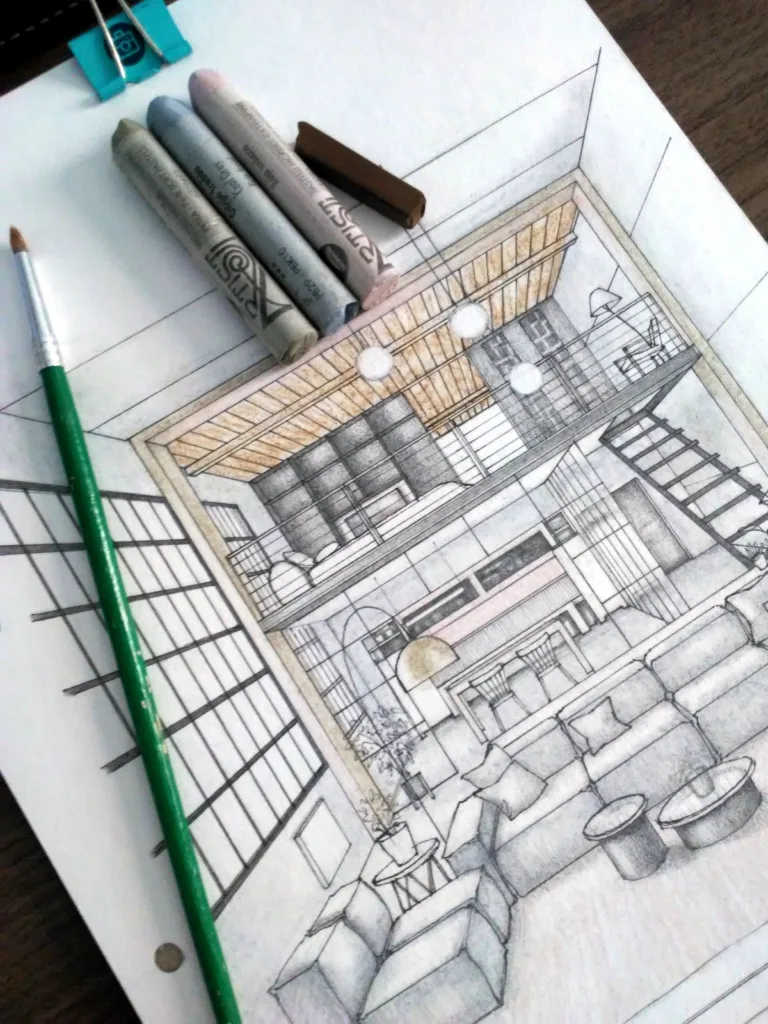
Try this dry soft pastels
Stage 7
Still using the dry pastels, you can overlay another layer of color on the areas where the color is most intense. When applying the colors, use a brush or paper to blend the colors together and with the graphite.

Stage 8
To complete, add the green of the vegetation and the red of some of the furniture. Then, use graphite to apply the shading to all parts of the drawing, including the shadows and the projected shadows.
This last step is the most time-consuming, as it involves a lot of attention and dedication to highlighting all the objects and giving greater contrast to the environment. This is done by using light and shadows with graphite mixed with dry pastel.

If you’re interested, by clicking on the button below you can take a look at my interior design illustration service for customized projects.
Feel free to let me know in the comments what you think of this type of artistic visualization for presenting interior design projects.