Architectural perspective plays a fundamental role in the visual communication of architectural, landscape, and interior design projects.
In particular, mastering this drawing technique can enhance your graphic skills as a designer, allowing you to more accurately present your projects and engage your audience.
In this article, we will explore some essential tips to help you master spatial visualization and the art of perspective drawing for architectural spaces.
WHAT IS ARCHITECTURAL PERSPECTIVE?
Architectural perspective is a form of graphical representation used to visualize and create the illusion of depth and three-dimensionality in space.
This technique applies to architectural drawings and design projects such as landscapes, interiors, and furniture. It allows the draftsman or designer to realistically depict how a building or space will appear once constructed.
Perspective visualization gives the viewer a clearer visual understanding of the project as a whole.
To obtain the spatial effect of three dimensions, this technique referred to as linear perspective. It relies on visual principles that involve the projection of lines and points drawn on a two-dimensional plane to create the perception of three-dimensional space. In addition, it includes concepts such as vanishing points, converging lines (or leading lines), and scale.
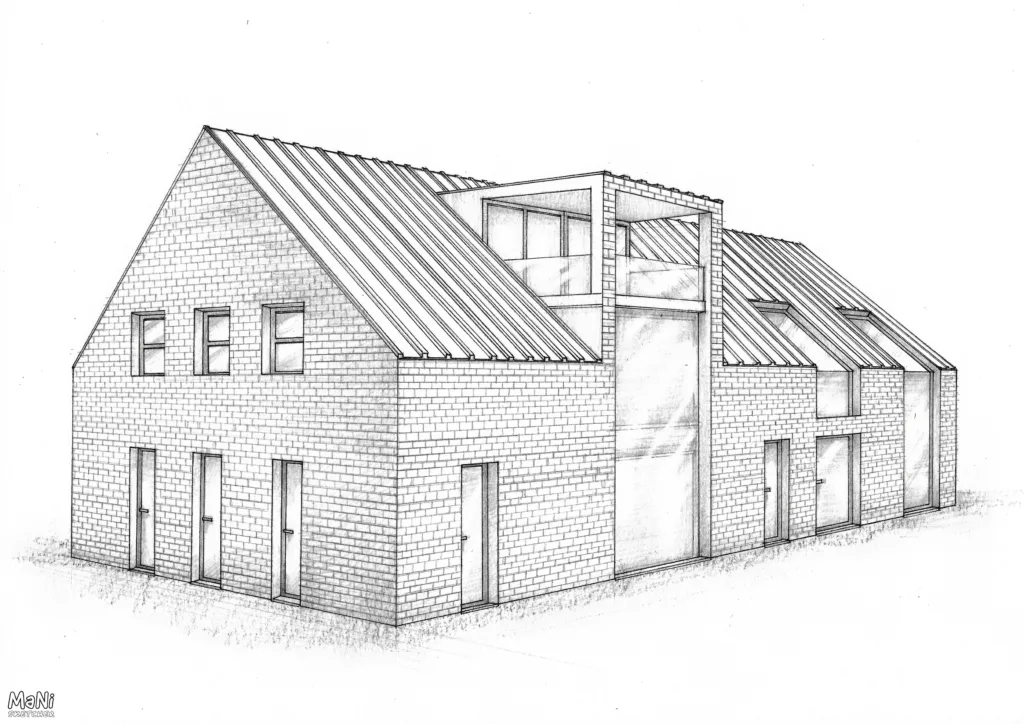
Architectural and landscape perspective images can be created using freehand drawing techniques (as in the example in Figure 1) or by using 3D modeling and rendering software to create realistic visualizations of projects.
BASIC PRINCIPLES FOR THE CONSTRUCTION OF ARCHITECTURAL PERSPECTIVE (linear)
One of the basic principles of linear perspective is that the size of observed objects decreases as the observer moves away from the observed object. Therefore, the further away an object is, the smaller it appears.
Additionally, visual scale is a key factor in conveying the correct proportions of architectural elements in a drawing. In other words, scale is the relationship between the actual dimensions of objects and the dimension at which you represent them in the drawing.
Below are some basic elements to consider when constructing a perspective drawing.
VIEWPOINT
It is the point that represents the person observing the perspective. This point coincides with the height of the eyes of the observer, who can be standing (about 1.7 m high), or sitting (1.1 m high). Alternatively, in a higher position, for example at the window on the tenth floor of a building, or in a helicopter, or in the sky simulating a bird flying (this last option is called a bird’s-eye view).
In general, you can position this point already in the drawing of the plan and elevation of the environment to be represented (example in Figure 2).

Depending on the position of the viewpoint (the observer) in relation to the observed object or environment, the perspective changes completely.
HORIZON LINE AND GROUND LINE
The horizon line is an imaginary horizontal line at the eye level of the viewer in any environment, both indoors and outdoors.
In linear perspective, this line is fundamental because it is the location of the vanishing points (explained in the next point), where most of the lines of the elements of the drawing converge.
Generally, in a natural landscape, this line is the same as the one that separates the sea from the sky, and is located at an infinitely distant point, as far as the eye can see. In an urban landscape or the interior of a building, the horizon line is invisible, and the draftsman must be able to distinguish it from other converging lines.
The ground line is another imaginary line you can draw when you want to construct a new linear perspective with precision and accuracy. This line coincides with the observer’s foot level (Figure 3).

WHERE TO POSITION THE HORIZON AND GROUND LINES
The position of the horizon line varies from composition to composition, depending on the viewer’s point of view and the desired visual result. It can be in the center of the composition, dividing the scene into two equal parts, or closer to the ground line or at the top of the page. If you want to visualize the perspective from the eyes of a standing person (example in Figure 4), the horizon and the ground line are approximately 1.7 meters apart. For a seated observer, these lines would be 1.1m apart.

On the other hand, if you want to get a wider perspective seen from above, the horizon line should be at the top of the sheet, while the ground line remains at the bottom (Figure 5).

Note, however, that it is not always necessary to draw the ground line when creating a perspective, unless you are constructing a perspective from a ground plan. In this case, it is important to draw the ground line as a reference for the measurements and proportions of the objects.
VANISHING POINT
The vanishing point is an imaginary point located on the horizon line. It is the point towards which the parallel lines in the drawing converge, creating a sense of distance and depth.
Depending on the number of vanishing points, the perspective can be central (with 1 vanishing point) or lateral (with 2 or 3 vanishing points). Figures 6, 7, and 8 show an example of a simple staircase viewed in central and lateral perspective


WHERE TO MARK VANISHING POINTS IN LATERAL ARCHITECTURAL PERSPECTIVE
When you want to start a lateral perspective drawing for a new architecture or design project, you cannot find the vanishing points based on the existing lines because the drawing does not exist yet.
Therefore, to determine the position of the vanishing points in the new composition, you can create a right-angled triangle in the floor plan in front of the represented object. The longer side of the triangle represents the plane on which the drawing is “printed”, and the other two sides, forming a right angle, define the viewpoint and the two vanishing points.
Figure 9 shows the entire construction of linear perspective. The red point represents the observer (viewpoint), from which you can generate a triangle with an angle of 90°, defining the two vanishing points. The line “h” represents the true height of the object (parallelepiped). The blue lines illustrate the process of constructing the perspective from the ground plan of the object.

VANISHING LINES
Also known as converging lines, vanishing lines (already shown in blue in Figures 6, 7, 8) are straight lines that start from objects in the drawing and converge toward the vanishing point. They define the shape and contour of architectural elements in the composition, creating a realistic sense of depth and three-dimensionality.
Although they define the contours of objects, vanishing lines in linear perspective are imaginary lines that converge to one or more vanishing points on the horizon. In other words, you must draw them provisionally as you construct the perspective to find the outlines of elements such as windows, doors, buildings, and so on. Then you can delete the superfluous vanishing lines (construction lines) and the final drawing will show only the contours.
In addition, as optional elements that you can consider in architectural perspective construction, we can mention light and shadow. By using illuminated and shaded areas, it is possible to create a sense of volume and represent the spatial depth of environments and objects.
ATMOSPHERIC PERSPECTIVE
Atmospheric perspective is a visual effect that occurs as the distance between the observer and the observed object increases. This is because the scattering of light in the atmosphere affects the perception of color and contrast.
For example, in a landscape drawing, it is common for objects closer to the viewer to appear sharper and more detailed, while those farther away tend to appear more muted, with less contrast and detail.
Therefore, when creating a perspective drawing using lines, a rule of thumb is that lines in the foreground, closer to the viewer, have greater thickness and color intensity. The thickness of the lines gradually decreases as they move away from the viewer. As a result, the lines in the background become thinner and lighter.
Similarly, the gradual change in the intensity of colors and tones applies to painted surfaces or hatchings. Surfaces that are farther away become lighter and less defined.
The use of atmospheric perspective complements linear perspective constructed with converging lines and vanishing points. In other words, you can use both techniques (atmospheric and linear) in the same drawing because they complement each other.
For example, when depicting natural or man-made landscapes, atmospheric perspective adds a sense of vastness and immensity to the environment. Similarly, in architectural illustrations, atmospheric perspective creates a visual sense of realism and depth in the scene depicted.
TIPS FOR IMPROVING YOUR PERSPECTIVE DRAWING SKILLS
Perspective is one of the most complex drawing techniques because it requires a great ability to visualize and analyze space. It requires dedication, practice, and experimentation.
One tip is to study references and works by other artists. As you study the compositional details of these works, try to identify how lines are used and how they contribute to the overall quality of the drawing. You can do this by visually following outlines and understanding the construction of linear perspective, focusing first on the larger shapes in the composition. Figure 10 shows an example of examining the composition and construction of linear perspective in a drawing.
In addition, practice observational drawing regularly, starting with simple objects and progressing to more complex ones. Begin with basic elements such as geometric shapes and gradually gain confidence in representing more detailed objects.
Also, explore different styles and techniques of shading and texture, and apply the principles of atmospheric perspective using tone, color, thickness, light, and shadow.

CONCLUSION
In conclusion, architectural, landscape, or other design perspectives are the most effective means of visually communicating your project ideas. Mastering linear perspective is an important step for those dedicated to projecting and graphically representing architectural and landscape space.
The tips discussed in this article can help you develop your drafting skills and enhance your spatial visualization abilities. With practice and study, perspective will become more intuitive and you will be able to draw more fluidly without strictly marking the basic elements on the page.
Please share your biggest challenge with perspective drawing in the comments and let us know if this article was helpful to you.
Version of the text in Italian and Portuguese.